
Suitable for:
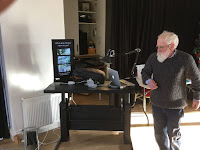
Small schools, community centres and businesses that only need one or two information screens.To make the screen more interesting, we installed in in portrait (vertical) orientation not landscape.
Ingredients (hardware)
All available from CPC Ireland.This setup will not work if you don't have reasonable broadband Internet eg more than 2Mb per second.
Acer 24 inch LED monitor – about €125
Raspberry Pi Model 3 value starter kit with power supply - about €58
Gothenburg Designs metal case for Raspberry Pi about €9
Pro Elec 13A 24 hr digital timer switch – about €5
Ethernet patch cable to connect Raspberry Pi to Internet – a few cents
HDMI cable to connect screen and Pi – about €3.80 for 5 metre cable
Micro SD card of at least 8 Gb - about €9
 Total just under €200.
Software:
Noobs (free; to save time you can get it pre-installed on an SD card)Screenly Pro – free for up to 2 screens https://www.screenly.io
Method:
If you haven't installed a Raspberry Pi before using Noobs, then this is a great video.https://www.youtube.com/watch?v=gbJB3387xUw
And these instructions are very clear: https://projects.raspberrypi.org/en/projects/noobs-install
We found it was important to have a correct power supply for the Raspberry Pi, and because it was being installed in a community centre, we put the Pi in a strong case with good ventilation.
 Connect the Raspberry Pi to power, WiFi (orange ethernet cable in picture) and to the screen (via the black HDMI cable).
Do not put the Pi on the timer. Only the screen goes on the timer to turn off the screen when the premises is unused.
Use a computer to set up your account at screenly.io.
The screenly.io website is unclear as it does not show how simple the setup process is, but once you have an account setup then you get access to the instructions which are straightforward to download software to the Raspberry Pi.
Results:
We have used images, URLs and slideshows created in Apple Mac Keynote, then exported into Quicktime format. These are uploaded as "assets" to screenly.io and then added to a playlist. By using a Quicktime export of the slide presentation with imported videos, we found you can also include videos from Youtube.Keynote has excellent animation effects and is easy to learn compared to PowerPoint.
One major advantage of screenly.io is you can update the content over the Internet eg from home.
For the design, we found using a black background was most effective.
Possible contents:
Adverts for upcoming events
Weekly schedule of classes and activities
Map of where the named rooms in the building are so users can find their event
Videos about the local area
The free public Wifi password
Closure notices due to severe weather
Details of how to join centre activities
Explain how to book or organise an event
Daily activities drawn from a public Outlook calendar
Another option is to use the free RiseVision software on a Chromebook with Google Slides and for schools the slideshow can also be districbuted to students' devices when they are on the school network:
https://github.com/Rise-Vision/player-chromeapp
https://chrome.google.com/webstore/detail/chrome-sign-builder/odjaaghiehpobimgdjjfofmablbaleem
We didn't do this in the end because it requires a computer and like any solution that uses Google kiosk mode, it puts the screen into the resolution of the computer which is usually worse than that of the screen.
Other suggestions implemented by other CESI members included a Xibo server, or a LibreOffice presentation. Our setup does not allow for the videos to play sound, but we felt that would be annoying to centre users.
 We found the best way to get content for the screen (often the most time-consuming part of a digital sign project) was to display the screen at an event where many of the community centre's groups were in attendance so they could see what it could do. This encouraged them to supply pictures and text about their activities.
Discussion:
You can connect the screens by WiFi, you don't have to use a connecting cable but we did this for reliability and low cost, and because the location where the screen was required happened to be close to a secure cupboard containing the network hardware and space where the Pi could be stored out of the way of curious fingers.Another option is to use the free RiseVision software on a Chromebook with Google Slides and for schools the slideshow can also be districbuted to students' devices when they are on the school network:
https://github.com/Rise-Vision/player-chromeapp
https://chrome.google.com/webstore/detail/chrome-sign-builder/odjaaghiehpobimgdjjfofmablbaleem
We didn't do this in the end because it requires a computer and like any solution that uses Google kiosk mode, it puts the screen into the resolution of the computer which is usually worse than that of the screen.
Other suggestions implemented by other CESI members included a Xibo server, or a LibreOffice presentation. Our setup does not allow for the videos to play sound, but we felt that would be annoying to centre users.
 We found the best way to get content for the screen (often the most time-consuming part of a digital sign project) was to display the screen at an event where many of the community centre's groups were in attendance so they could see what it could do. This encouraged them to supply pictures and text about their activities.

No comments:
Post a Comment